
How to Grow Your Own Sprouts
Today we are going to be talking about ALL things sprouts. You have probably seen sprouts on sandwiches or salads, and not really known exactly what they are. Maybe you love them, or maybe you skip them. But in this post, you will learn all the information you need to get started with a step-by-step guide for how to grow your own sprouts right at home.

What are sprouts?
Sprouts are typically the young greens that are not fully grown into the mature plant. Their seeds have just germinated, and have small green leaves, and sometimes the sprouts look like little tails.
There are several categories of sprouts:
- beans and legumes: chickpeas, black beans, mung beans, lentils, etc.
- nuts and seeds: pumpkin seeds, sunflower seeds, sesame seeds etc.
- vegetables: alfalfa seeds, broccoli seeds, etc.
- grains: quinoa, wheatgrass, millet, etc.
Health Benefits of Sprouts
Sprouts are nutritional powerhouses. They possess tons of vitamins, minerals, antioxidants, and enzymes. When you sprout certain seeds, you are really maximizing their nutrient density, absorption, and optimal digestion. Gram for gram, sprouts are much more nutrient dense than the seed version of itself.
Alfalfa sprouts are also a proven high-antioxidant food, which can help fight oxidative stress and free radicals, which in turn can help reduce the risk of diseases that are linked to aging. There have been studies to show that because of the vitamin K and phytoestrogens, sprouts can be beneficial for women’s hormonal health, reduce the risk of breast cancer, and even prevent osteoporosis.
All legumes, nuts, seeds, and grains have an organic compound called phytic acid. Phytic acid inhibits the absorption of several vitamins and minerals such as iron, zinc, calcium, and B vitamins. Soaking and sprouting your food helps break down the phytic acid to ultimately promote the proper absorption.
Sprouts are abundant in nutrients like protein, vitamin C, folate, magnesium, and B vitamins, just to name a few.

How to Grow Your Own Sprouts At Home
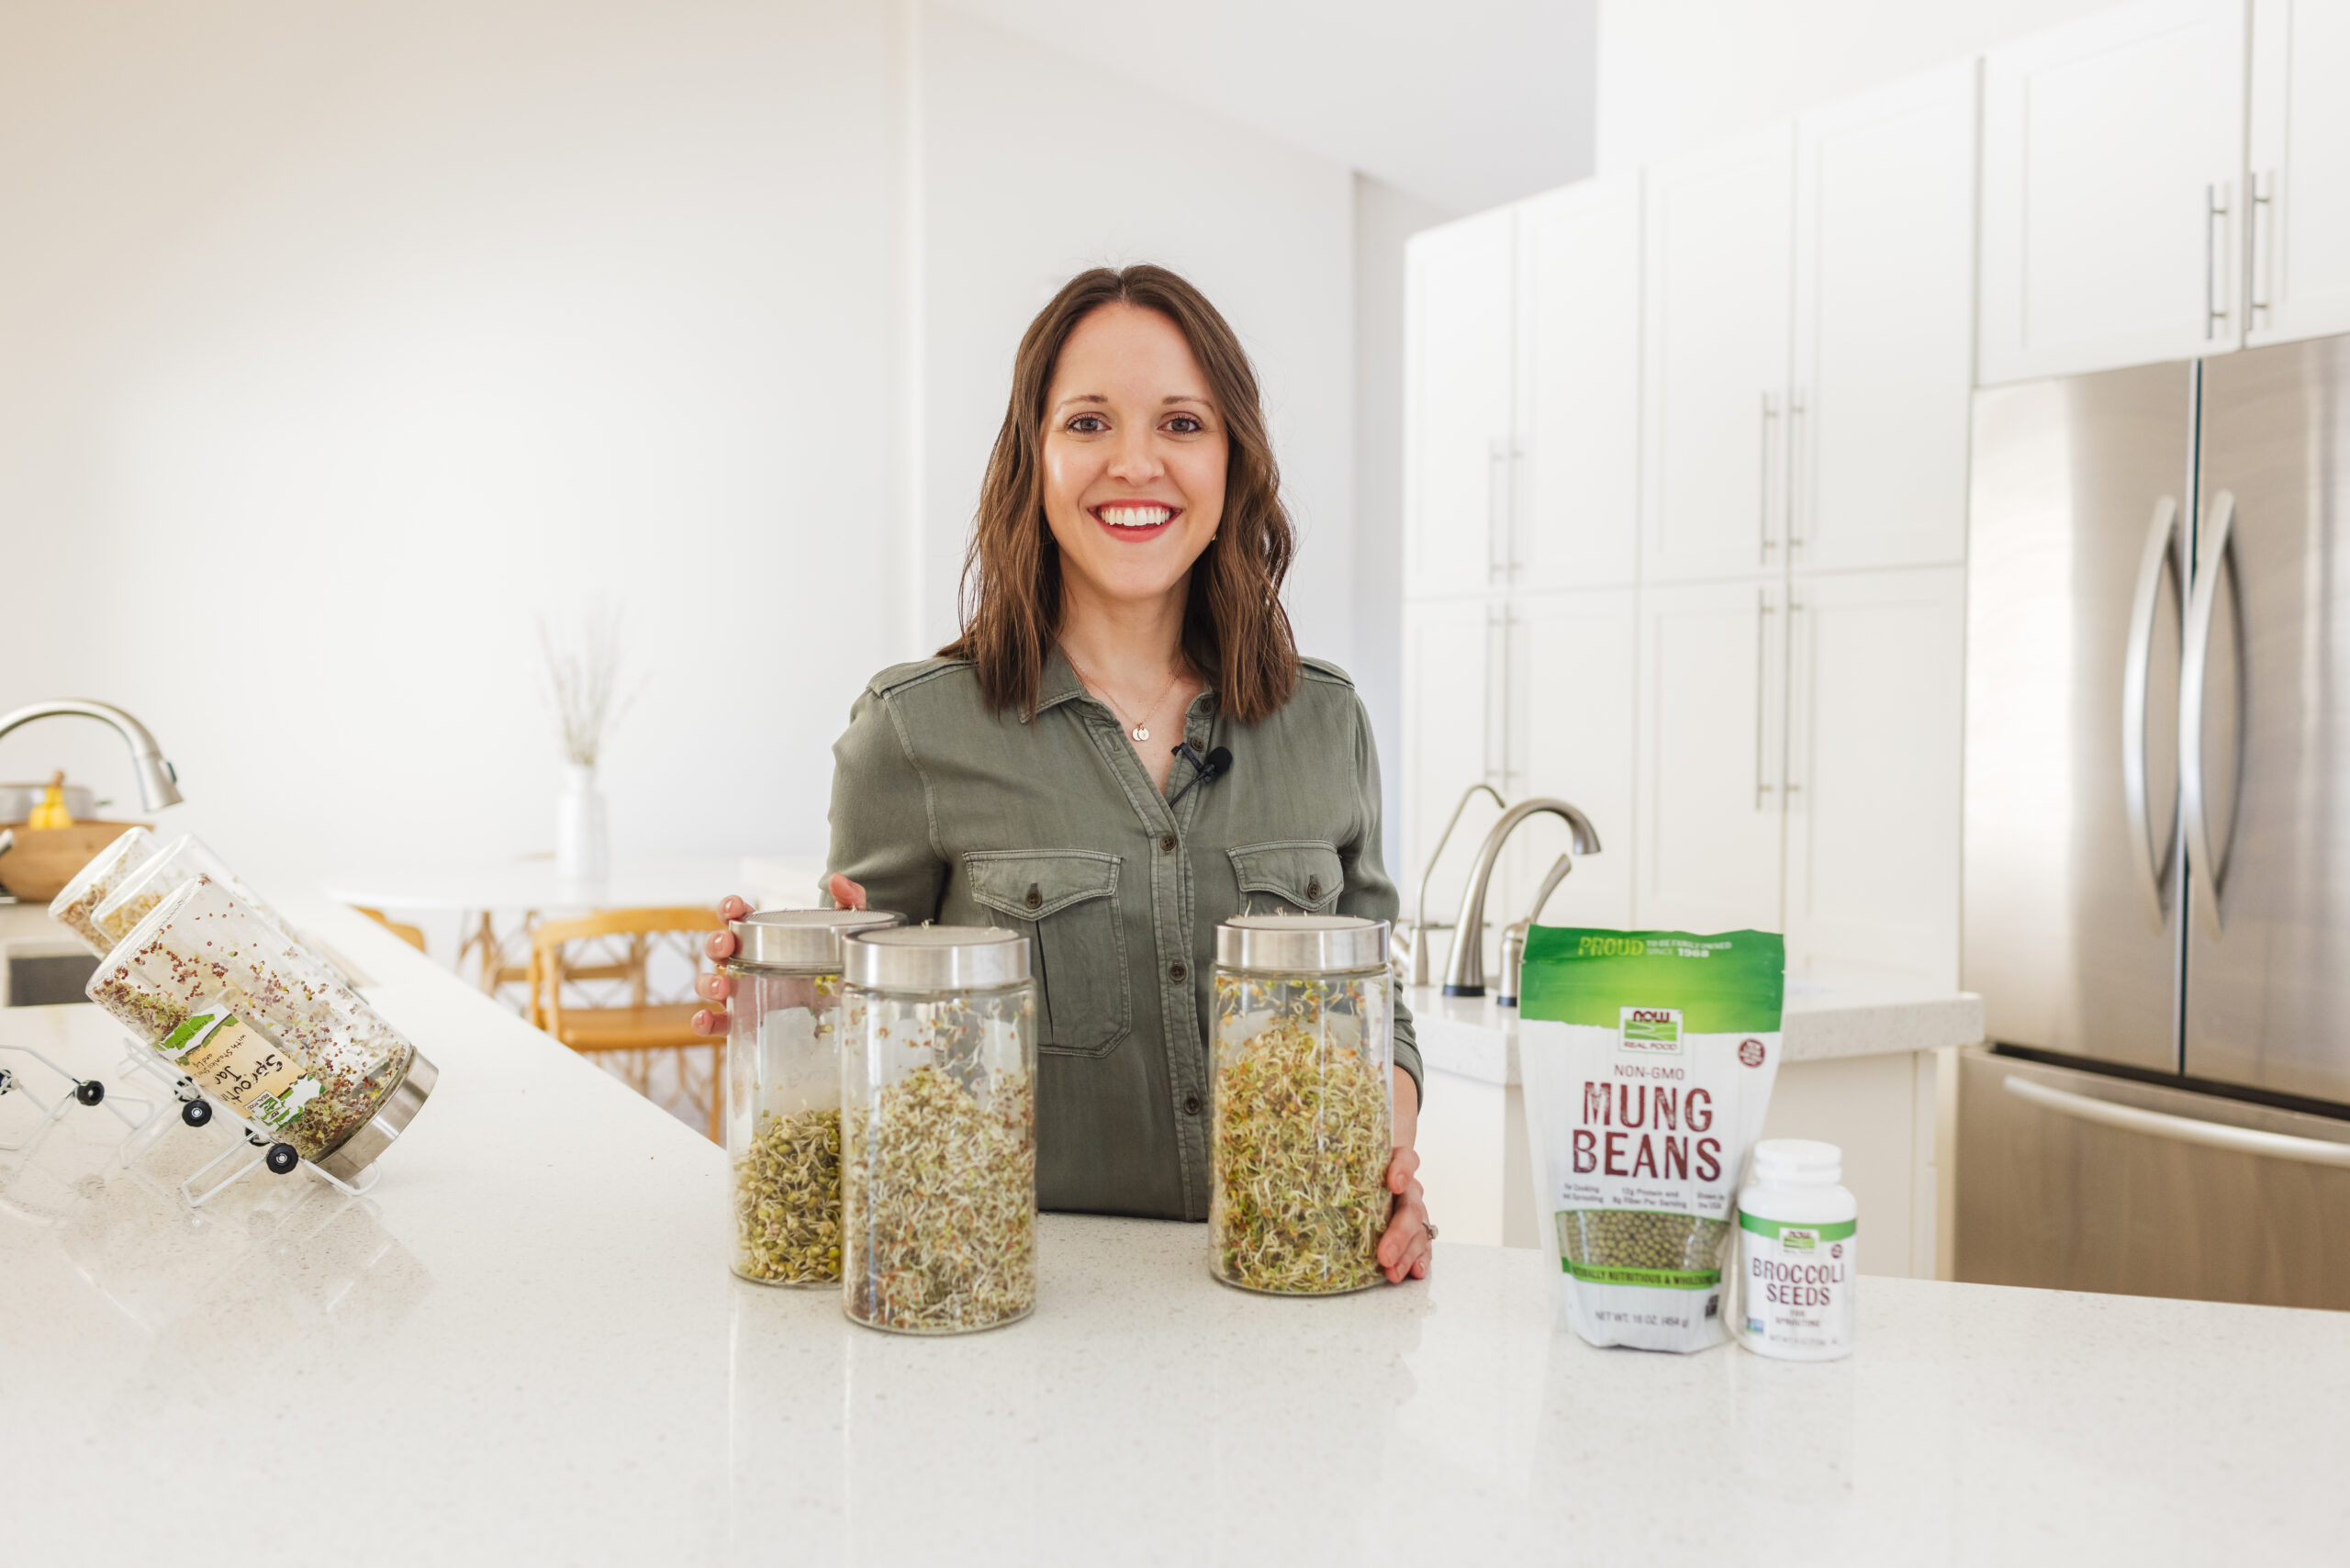
Growing sprouts at home is much easier than I thought it would be. It is especially helpful if you have a jar that is made for sprouting, like I used here. I used a sprouting jar from NOW Foods and it worked perfectly! The jar has a mesh lid that makes draining the water from your sprouts so much easier.
Before you start:
- Make sure that you are working with organic seeds that aren’t sprayed with fungicides or other chemicals
- Use seeds that are meant for sprouting
- Clean your jar with soap and water before sprouting
Step 1: If you are using a 1/2 gallon jar like I am here, then you will use 1/4 cup of seeds. Start by pouring 1/4 cup of seeds into the jar, and then add 3/4 cup cold filtered water. Let them soak overnight (or about 8 hours).
The amount of water doesn’t have to be exact, just make sure the water covers the seeds by about an inch or two.
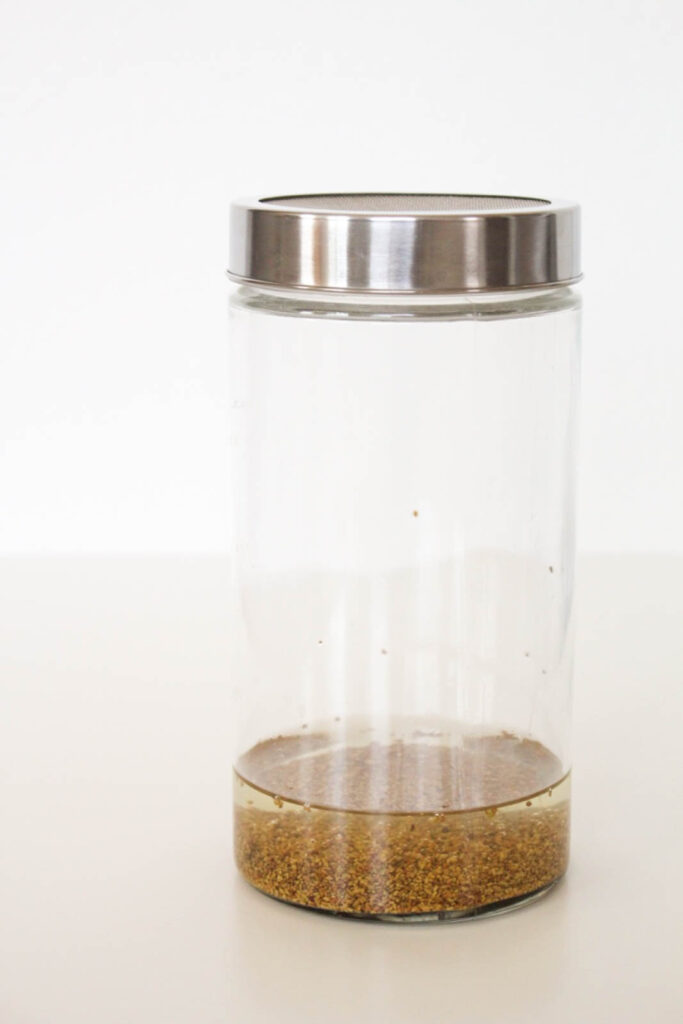
Step 2: Once the seeds have soaked, you are going to drain the water. Next, you will want to rinse the seeds by adding more water and draining again, you may need to repeat this one more time until the water runs clear.
Once you have completely drained the water, lay your jar at an angle in a warm, dark place. This is important because sprouting occurs in the darkness, so I like to keep my sprouting jar in my pantry during this process.
This is DAY 1.

Step 3: You are now going to repeat the rinsing and draining process twice a day. I do this in the morning and then again at night. Just use lukewarm water, and be gentle with your sprouts when you drain them. Make sure you really get all of the water out, you don’t want stagnant water sitting in the bottom of the jar.
On DAY 2 you will start to see the little “tail” start to sprout from the seed. This means it’s growing! (Don’t forget to keep rinsing and draining each morning and night!)

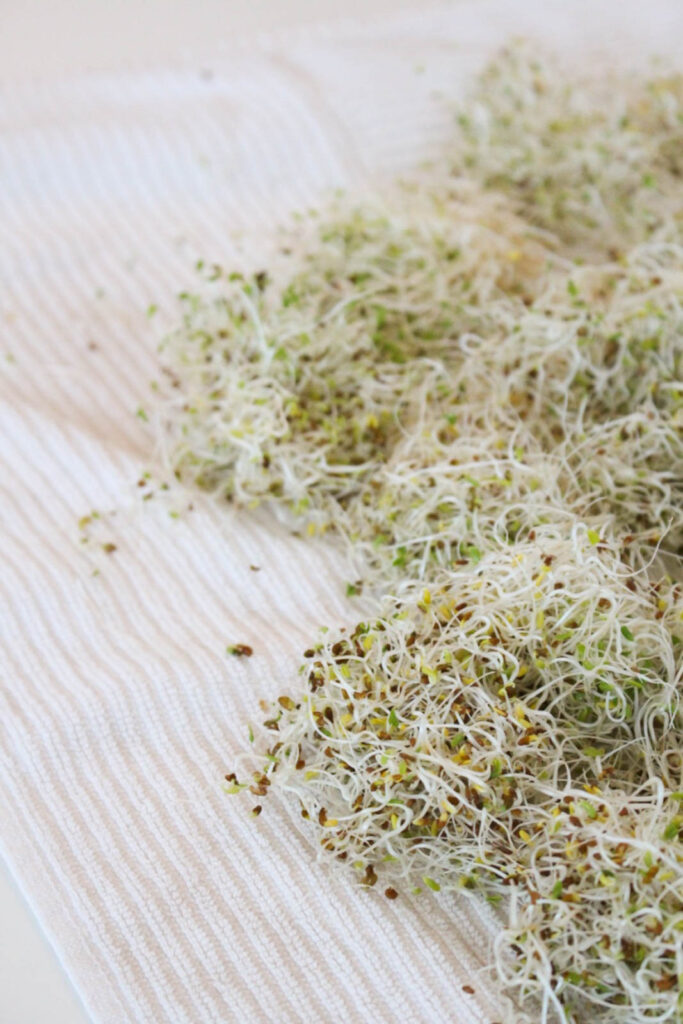
On DAY 3, the tails will have grown much longer, and the sprouts will basically be taking up the entire contents of the jar. They may even be starting to sprout tiny little leaves.

On DAY 4, you are almost done! This is when you will place your alfalfa sprouts in the sunlight so that they can develop chlorophyll. I like to place my jar in a windowsill that has indirect sunlight. It only takes a few hours to see the leaves develop a much brighter green color. Turn the jar occasionally so that all sides get to see the sunlight.

THE LAST STEP: Once you have gone through the sprouting process, you now need to prepare them for storage. First, you need to clean out your sink with soap to make sure there are no lingering germs, then fill your sink with cold water. Take the sprouts out of the jar and put them into the water. Use your hand to gently shake them a bit to let the hulls separate from the sprouts. Then just pull the sprouts out and place them in an even layer on a dish towel to dry out. I let mine sit out for a few minutes to dry, then store them in an airtight container with a paper towel underneath them to soak up excess moisture.
You did it! Now you know how to grow your own sprouts! Once you do it, you realize it really is easier than it seems.
How to Store Sprouts
There are several ways to keep your sprouts fresh in the refrigerator. You can wrap them in a mesh cheesecloth or nut milk bag, or even put them in an airtight container with a paper towel to absorb some of the moisture. Be sure to use them within 3-4 days for optimal freshness, nutrients and safety.
Note: sprouts are at risk for contamination from foodborne illnesses and bacteria such as E. coli. This can simply be avoided by using safe practices. Be sure to keep your kitchen and jars clean, and always wash your hands.
- One way to prevent bacteria in the sprouting process is to use citric acid. Citric acid helps inhibit the formation of mold and other bacterial growth, an all-too-common occurrence when sprouting in a jar due to the humidity and condensation. All you would need to do is add about a teaspoon per quart of water when you are soaking your seeds.
How to Use Sprouts In Meals
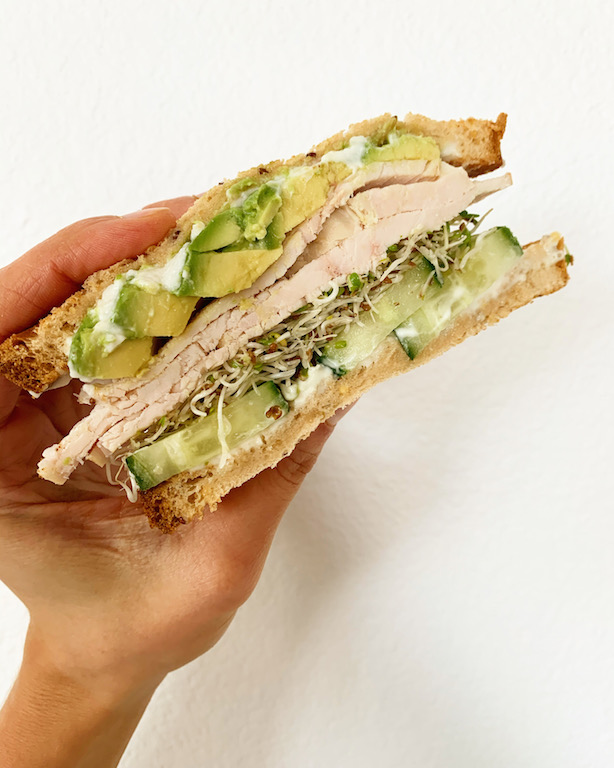
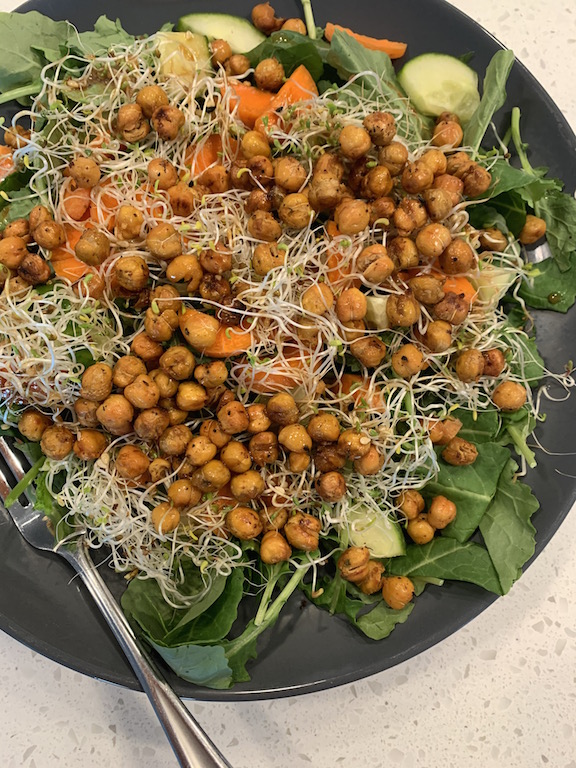
You can put alfalfa sprouts on pretty much anything because they are a more delicate sprout. I like to use mine to top salads, put them on sandwiches, and even pile on top of my avocado toast.
- For sprouted beans and legumes, you can cook them and eat them just as you normally would.
- For sprouted grains like quinoa, you can use them just as your normally would, or even in granola and baked goods.
As you can see, growing your own sprouts takes very little time and effort, but yields huge results in terms of quantity, as well as the nutritional benefits. If you are interested in any of the sprouting seeds and jars that I used, check out nowfoods.com/sprouting for everything you will need to grow your own sprouts!
*Thank you, NOW Foods for sponsoring this post! All opinions are my own.
FOLLOW ALONG! Subscribe to my newsletter and follow along on Facebook, Instagram, and Pinterest for my latest recipes!
Hello, is there a printable version of this?
Hi Shayna,
There is not currently a printable version. But I will start working on creating one and include it soon! Thank you for the suggestion!